How To: Create a New Uno Application
In this guide, you will learn how to create an Uno Platform application using the Wizard or dotnet CLI to follow, for example, the Xaml Navigation App Tutorial.
To follow along, you should have previously completed the Development Environment Setup Guide.
Video Tutorial on Configuration
Note
This video is currently only available in German, but transcriptions have been added to the video description, which should be usable through YouTube's auto-translate feature. You can also enable auto-translated subtitles in YouTube to follow along in your preferred language.
Create and Configure an Uno App via Template
In the following, you will learn how to configure an Uno app by selecting the desired options. You can either use the Visual Studio Wizard or the dotnet CLI tool. For the latter, it is recommended to visit the Web Wizard to make configuration easier and get the appropriate dotnet new command!
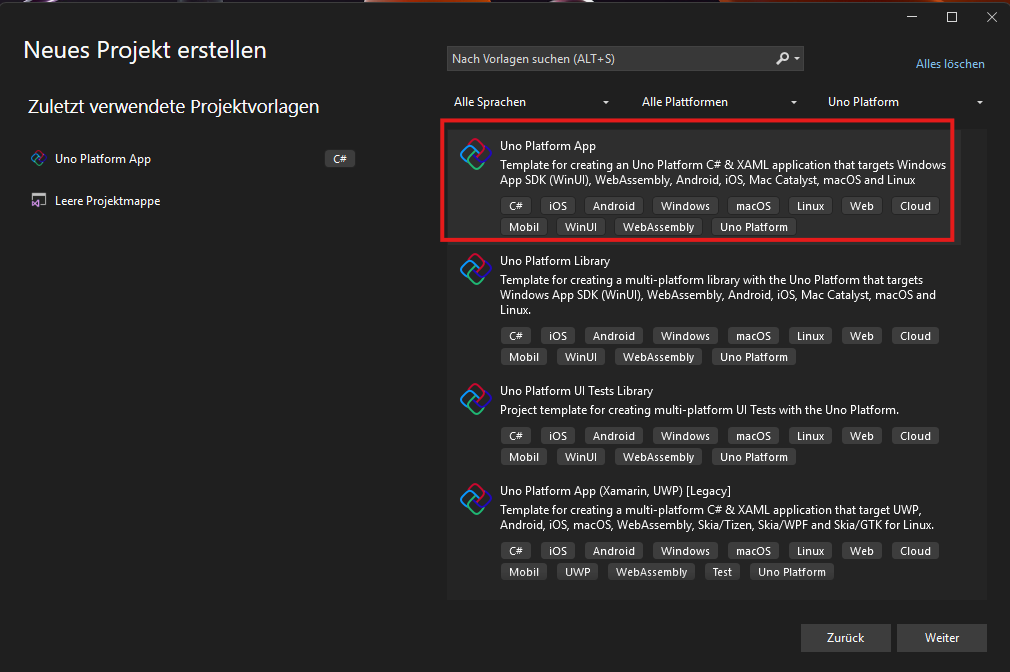
Select Template
Open Visual Studio 2022 and select "Create a new project" in the start window.
Search for the template "Uno App" and select it. Click "Next".
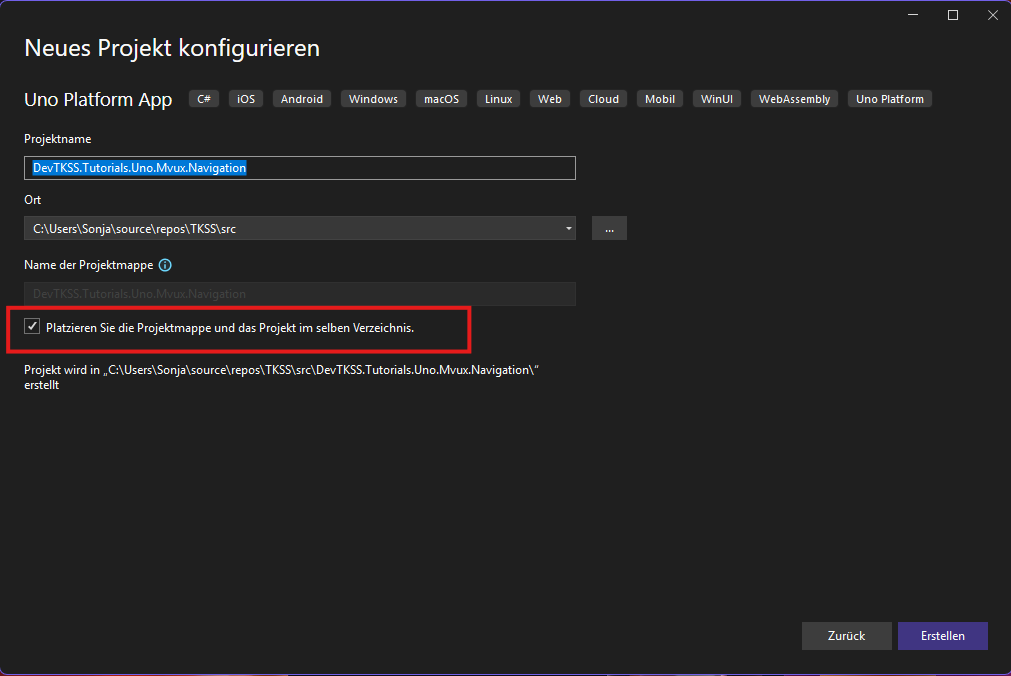
Give your project a name and enable the option "Place solution and project in the same directory". Then click "Create".
The Template Wizard
Select the following options in the Visual Studio Wizard to configure your app: (using the Xaml Navigation App Tutorial as an example)
Use the preset
recommendedTarget Framework:
net9.0As
Platformselect at least Desktop or Skia Desktop.Markup:
Xaml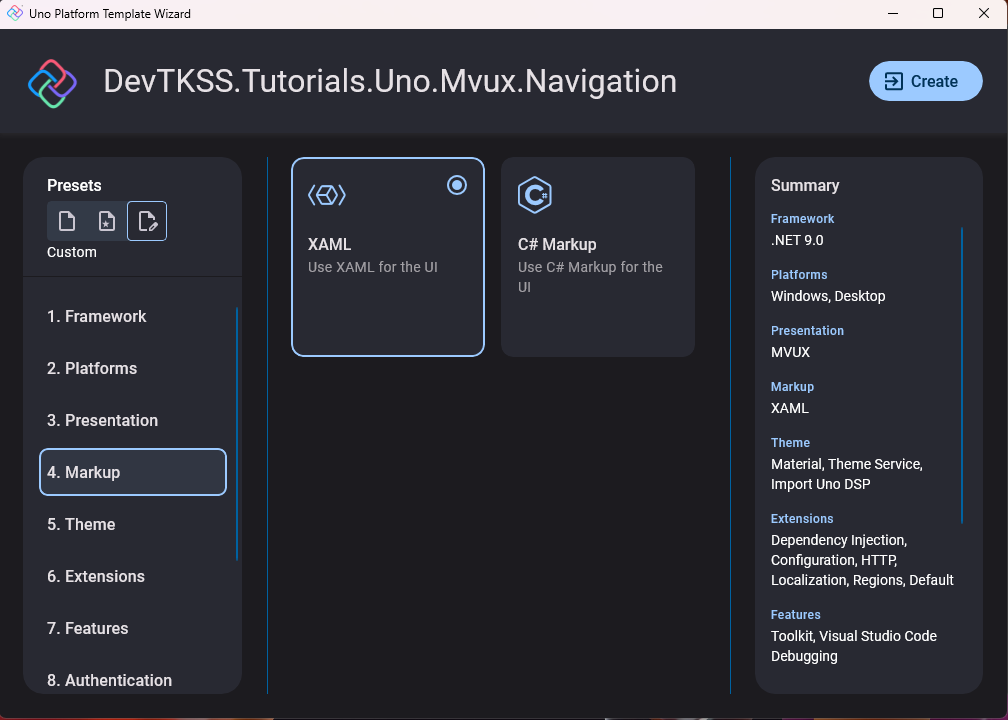
Presentation:
MVUX
Select the Material Design Theme under Themes.
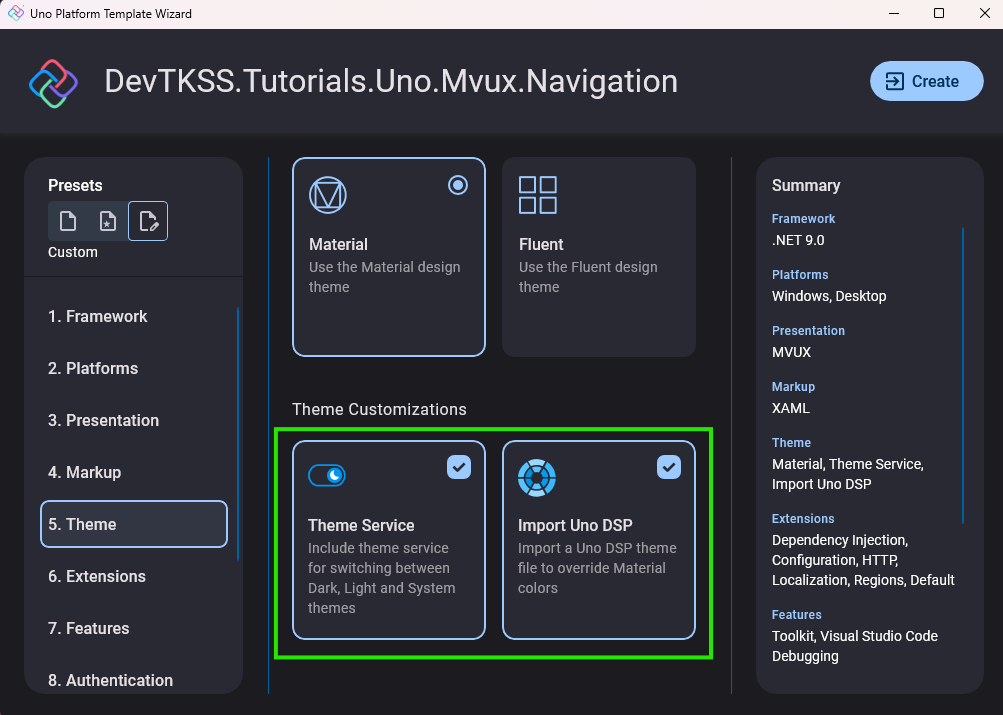
Tip
By default, ThemeService is also selected, which would allow you to switch between light and dark UI later. It is not directly required here, but you can leave it in if you like.
Extensions:
Regions,DependencyInjection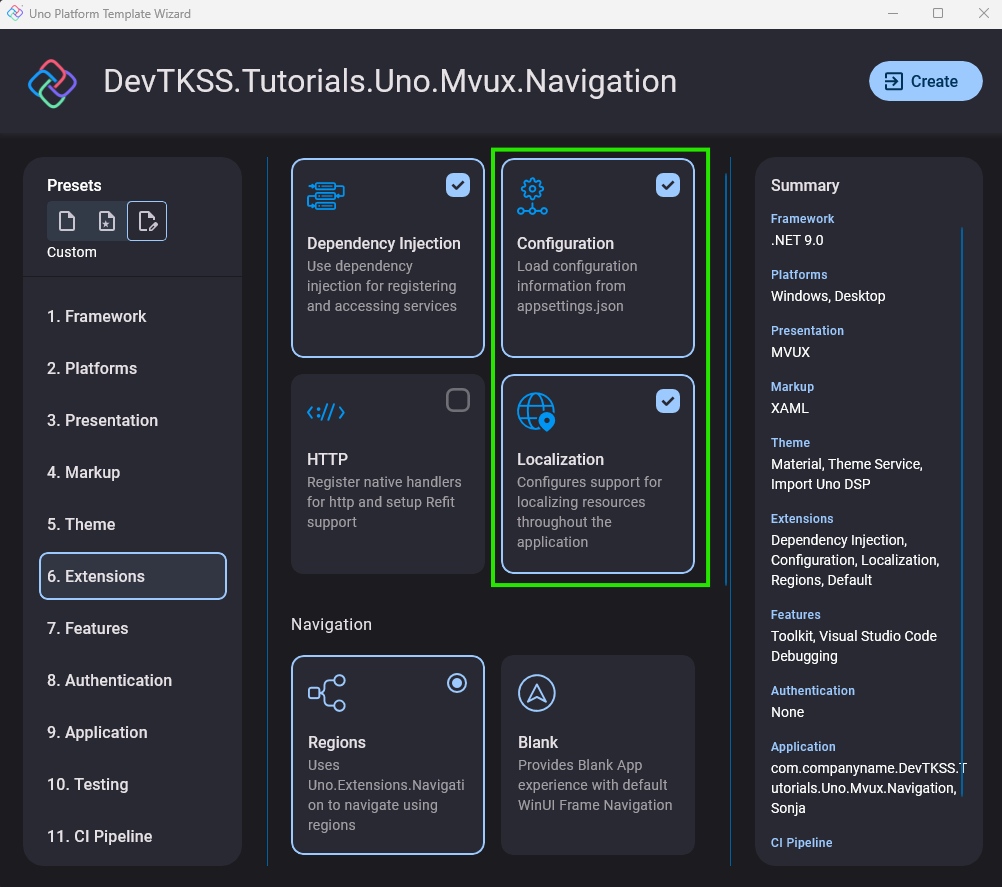
(Optional) select the Uno Toolkit.
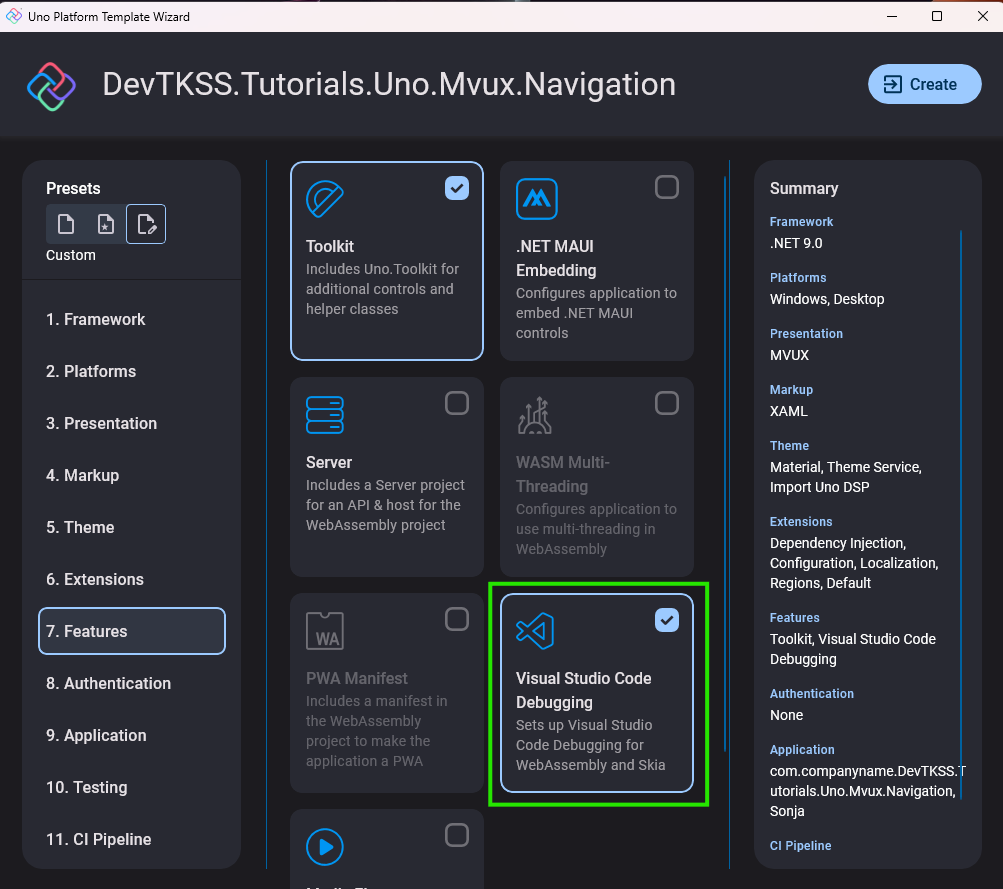
Tip
If you want to keep the option open to develop in Visual Studio Code later, you should also select
Visual Studio Code Debugginghere.Finally, click
Createto generate the app.